本文讲述如何实现实时视频采集程序,包含三部分:
1、摄像头检测
2、GUI界面设计
3、视频采集程序实现
直接进入正文。
1、摄像头检测
几个关键词 :
imaqhwinfo, DeviceInfo, DeviceName, SupportedFormats以下含有 >> 开头的为 matlab 终端操作。
imaqhwinfo : 当前可用的图像设备信息
1
2
3
4
5
6
7
8
>> info = imaqhwinfo
info =
InstalledAdaptors: {'matrox' 'winvideo'}
MATLABVersion: '7.14 (R2012a)'
ToolboxName: 'Image Acquisition Toolbox'
ToolboxVersion: '4.3 (R2012a)'
这样,我们可以看到有两个图像设备适配器 'matrox' 'winvideo' 。
一般情况下,我们使用的 USB 摄像头在 ‘winvideo’ 中。
接着我们获取适配器的具体信息。
1
2
3
4
5
6
7
8
9
>> winfo = imaqhwinfo('winvideo')
winfo =
AdaptorDllName: [1x74 char]
AdaptorDllVersion: '4.3 (R2012a)'
AdaptorName: 'winvideo'
DeviceIDs: {[1] [2]}
DeviceInfo: [1x2 struct]
DeviceInfo : 设备的具体信息
1
2
3
4
5
6
7
8
9
10
11
12
>> winfo.DeviceInfo
ans =
1x2 struct array with fields:
DefaultFormat
DeviceFileSupported
DeviceName
DeviceID
VideoInputConstructor
VideoDeviceConstructor
SupportedFormats
这里的信息是 设备信息 , 区别于上面的 适配器信息 。
我们可以逐项查看设备信息,这里只列出我们需要关注的三种设备信息
DeviceName, DeviceID, SupportedFormats 。
1
2
3
4
5
6
7
8
9
10
11
12
13
14
15
16
17
18
19
20
21
>> winfo.DeviceInfo.DeviceName
ans =
Lenovo EasyCamera
ans =
USB2.0 Camera
>> winfo.DeviceInfo.DeviceID
ans =
1
ans =
2
对应矩阵 1 为系统自带摄像头, 矩阵 2 为USB摄像头。
1
2
3
4
5
6
7
8
9
10
11
12
13
14
15
16
17
18
19
20
>> winfo.DeviceInfo.SupportedFormats
ans =
Columns 1 through 4
'MJPG_1280x720' 'MJPG_1600x1200' 'MJPG_160x120' 'MJPG_320x240'
Columns 5 through 8
'MJPG_640x480' 'MJPG_800x600' 'YUY2_1280x720' 'YUY2_1600x1200'
Columns 9 through 12
'YUY2_160x120' 'YUY2_320x240' 'YUY2_640x480' 'YUY2_800x600'
ans =
'YUY2_160x120' 'YUY2_176x144' 'YUY2_320x240' 'YUY2_352x288' 'YUY2_640x480'
在这个 SupportedFormats 中,第一个 ans 中的分辨率对应为系统自带摄像头分辨率,第二个 ans 为USB摄像头分辨率。
这部分到这里先停止。我们只需要记下来两个信息 :
(1) imaqhwinfo('winvideo') 能够获取到具体的设备信息
(2) SupportedFormats 中 USB摄像头的最高分辨率 YUY2_640x480
2、GUI 界面浅析
(1) 构建新的 GUI
>> guide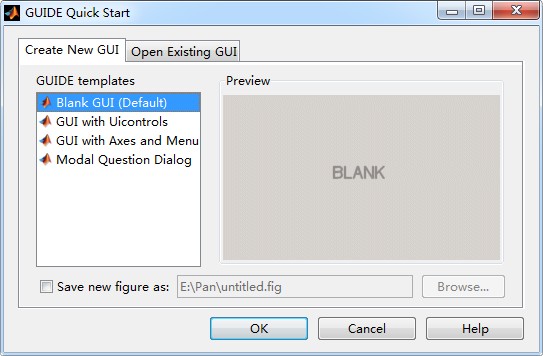
选择 Blank GUI (Default)。
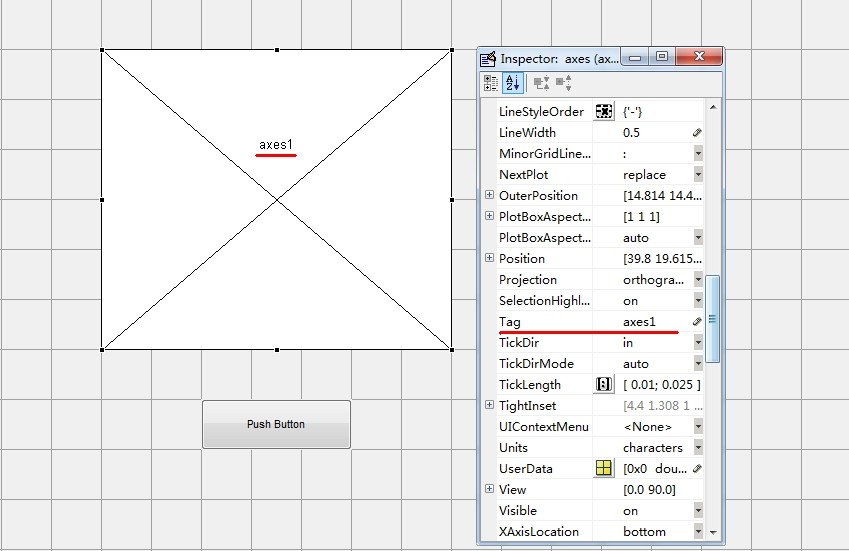
(2) 拖放我们常用控件 axes, button 。
axes :
button :
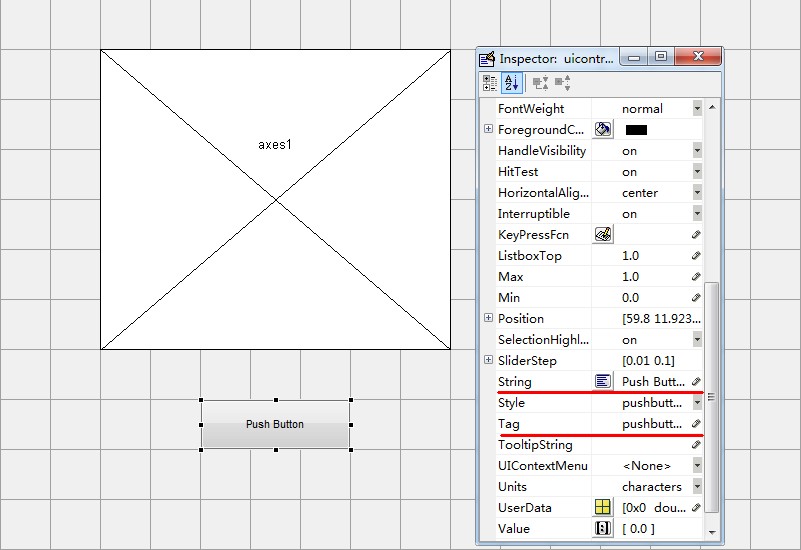
对于控件,我们只需要关注 String, Tag 两个元素。
(3) 为我们的控件设置操作函数(Callback)
右键点击我们的 button -> View Callbacks -> Callback

接着会跳转到我们自动生成的 .m 文件(需要先保存)。
function sbutton_Callback(hObject, eventdata, handles)在这个函数中,任何我们填充的操作,都会成为 button 按下的操作。
例如 :
1
2
3
4
function sbutton_Callback(hObject, eventdata, handles)
axes(handles.axes1);
I = imread('img.jpg');
imshow(I);
当我们按下 button 的时候,将在 axes1 中打开图片 img.jpg 。
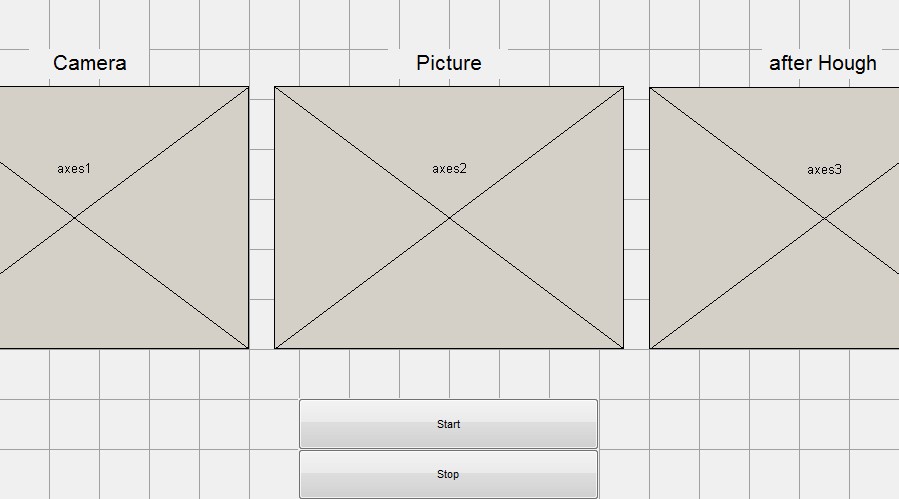
3、视频采集程序实现
(1) GUI 界面
由 3个 axes 与 2个 button 组成。
(2) Start button 的操作函数(Callback)
1
2
3
4
5
6
7
8
9
10
11
12
13
14
15
16
17
18
19
20
21
22
23
24
25
26
27
28
29
30
31
32
33
34
35
36
37
38
39
40
41
42
43
44
45
46
47
48
49
50
51
52
53
54
55
56
57
58
59
60
61
62
63
64
65
66
67
68
69
70
71
72
73
74
75
76
77
78
79
80
81
82
83
84
85
86
87
88
89
90
91
92
93
94
95
96
97
98
99
100
101
102
103
104
105
106
107
108
109
110
111
112
113
114
115
116
117
118
119
120
121
122
123
124
125
126
127
128
129
130
131
132
133
134
135
136
137
138
139
140
function sbutton_Callback(hObject, eventdata, handles)
%% clear screen
clc;
%将 video 变成全局变量,这样 stop 按键也能控制其停止
global video;
%% camera
%获取设备信息
info = imaqhwinfo('winvideo');
%使用USB摄像头最高分辨率输入
video = videoinput('winvideo', 2 ,'YUY2_640x480');
axes(handles.axes1);
vimg = image(getsnapshot(video));
preview(video, vimg);
while(1) %实时处理循环
%% picture
%我们使用 getsnapshot 的图像并非三色原图,所以需要 ycbcr2rgb 将图片转换
pic = getsnapshot(video);
pic = ycbcr2rgb(pic);
%axes(handles.axes2);
%imshow(pic);
%% hough
I = pic;
%b = [0 1 0; 1 1 1; 0 1 0];
%I = imdilate(I,b);
%I = imdilate(I,b);
%figure, imshow(I);
BW = edge(im2bw(I), 'canny');
[H, T, R] = hough(BW);
%figure, imshow(H, [], 'XData', T, 'YData', R, 'InitialMagnification', 'fit');
%xlabel('\theta'), ylabel('\rho');
%axis on, axis normal, hold on;
P = houghpeaks(H, 5, 'threshold', ceil(0.3*max(H(:))));
x = T(P(:,2));
y = R(P(:,1));
%plot(x, y, 's', 'color', 'white');
lines = houghlines(BW, T, R, P, 'FillGap', 7, 'MinLength', 7);
%figure, imshow(I), hold on;
%图2显示画上标线的图片
axes(handles.axes2);
imshow(I,'InitialMagnification','fit'), hold on;
pause(0.15); %延时等待0.15
max_len = 0;
%检测不到线的时候,continue
if (length(lines) <= 1)
continue;
end
for k = 1:length(lines);
xy = [lines(k).point1; lines(k).point2];
plot(xy(:,1), xy(:,2), 'LineWidth', 2, 'Color', 'blue');
plot(xy(1,1),xy(1,2),'x','LineWidth',2,'Color','yellow');
plot(xy(2,1),xy(2,2),'x','LineWidth',2,'Color','red');
len = norm(lines(k).point1 - lines(k).point2);
Len(k) = len;
if (len > max_len)
max_len = len;
xy_long = xy;
end
end
%检测不到线的时候,continue
if (max_len == 0)
continue;
else
plot(xy_long(:,1),xy_long(:,2),'LineWidth',2,'Color','green');
end
[~, Index1] = max(Len(:));
Len(Index1) = 0;
[~, Index2] = max(Len(:));
lcnt = length(lines);
%当线的下标超过所有线的下标时,设为最高的下标
if (Index1 > lcnt)
Index1 = lcnt;
end
if (Index2 > lcnt)
Index2 = lcnt;
end
x1=[lines(Index1).point1(1) lines(Index1).point2(1)];
y1=[lines(Index1).point1(2) lines(Index1).point2(2)];
K1=(lines(Index1).point1(2)-lines(Index1).point2(2))/(lines(Index1).point1(1)-lines(Index1).point2(1));
x2=[lines(Index2).point1(1) lines(Index2).point2(1)];
y2=[lines(Index2).point1(2) lines(Index2).point2(2)];
K2=(lines(Index2).point1(2)-lines(Index2).point2(2))/(lines(Index2).point1(1)-lines(Index2).point2(1));
pause(0.1);%延时等待0.1s
[m,n] = size(BW); % 尺寸
BW1=zeros(m,n);
b1=y1(1)-K1*x1(1);
b2=y2(1)-K2*x2(1);
for x=1:n
for y=1:m
if y==round(K1*x+b1)||y==round(K2*x+b2)
BW1(y,x)=1;
end
end
end
for x=1:n
for y=1:m
if ceil(K1*x+b1)==ceil(K2*x+b2)
BW1(1:y1-1,:)=0;
end
end
end
%figure,imshow(BW1),hold on;
%plot(n/2, m, '*');
%figure, plot(x1, y1), hold on;
%plot(x2, y2);
%plot(n/2, m, '*');
%dl1 = abs(K1*(n/2) + m + b1)/sqrt(K1^2 + 1)
%dl2 = abs(K2*(n/2) + m + b2)/sqrt(K2^2 + 1)
%图3显示处理后的图片
axes(handles.axes3);
imshow(BW1,'InitialMagnification','fit');
pause(0.15);%延时等待0.15秒
end
%关闭视频输入
closepreview(video);
(3) Stop Button 操作函数(Callback)
1
2
3
4
5
6
7
8
function hbutton_Callback(hObject, eventdata, handles)
%声明全局变量
global video;
%关闭输入设备
closepreview(video);
stop(video);
%停止GUI
uiwait;
© 2014 plinx